Create your own meme with Thimble
Intro
Thimble is part of the Mozilla webmaker tools designed to help learn and teach coding in HTML and CSS.
You can create your own web pages or remix existing web pages and publish them online. This example will walk you through creating and sharing your own meme image by creating a simple HTML page and styling it using CSS.
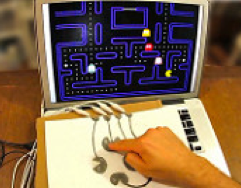
What we want to create is something like this:
What you need
- Thimble is feely available to use via https://thimble.mozilla.org/. To save and publish your work, you’ll need to create an account.
- A meme image - To find public domain images to use for your meme, try the Public Domain Archive or Pixabay.
How
Start a new project with Thimble at: https://thimble.mozilla.org/
Click on ‘Start a project from scratch’
What we want to create is something with an image and 2 captions (as above).
When we start, we have the Thimble default page that includes a heading and a paragraph. The headings are assigned number levels so for a large header you use <h1> tags and for smaller headers you can use <h6>. HTML tags need to be opened and closed. So for our first header, we can change it to be:
<h1>First caption goes here</h1>
We won’t be using the paragraph for this project, so you can delete the <p>…</p> section.
You can update the title for your project too. Your project should now look something like this:
<!DOCTYPE html>
<html>
<head>
 <meta charset="utf-8">
<meta name="viewport" content="width=device-width, initial-scale=1">
 <title>My Meme</title>
 <link rel="stylesheet" href="style.css">
</head>
<body>
  <h1>First caption goes here</h1>
</body>
</html>
Now we need to add an image.
Add an image. you can upload new files using the file upload button on the left.
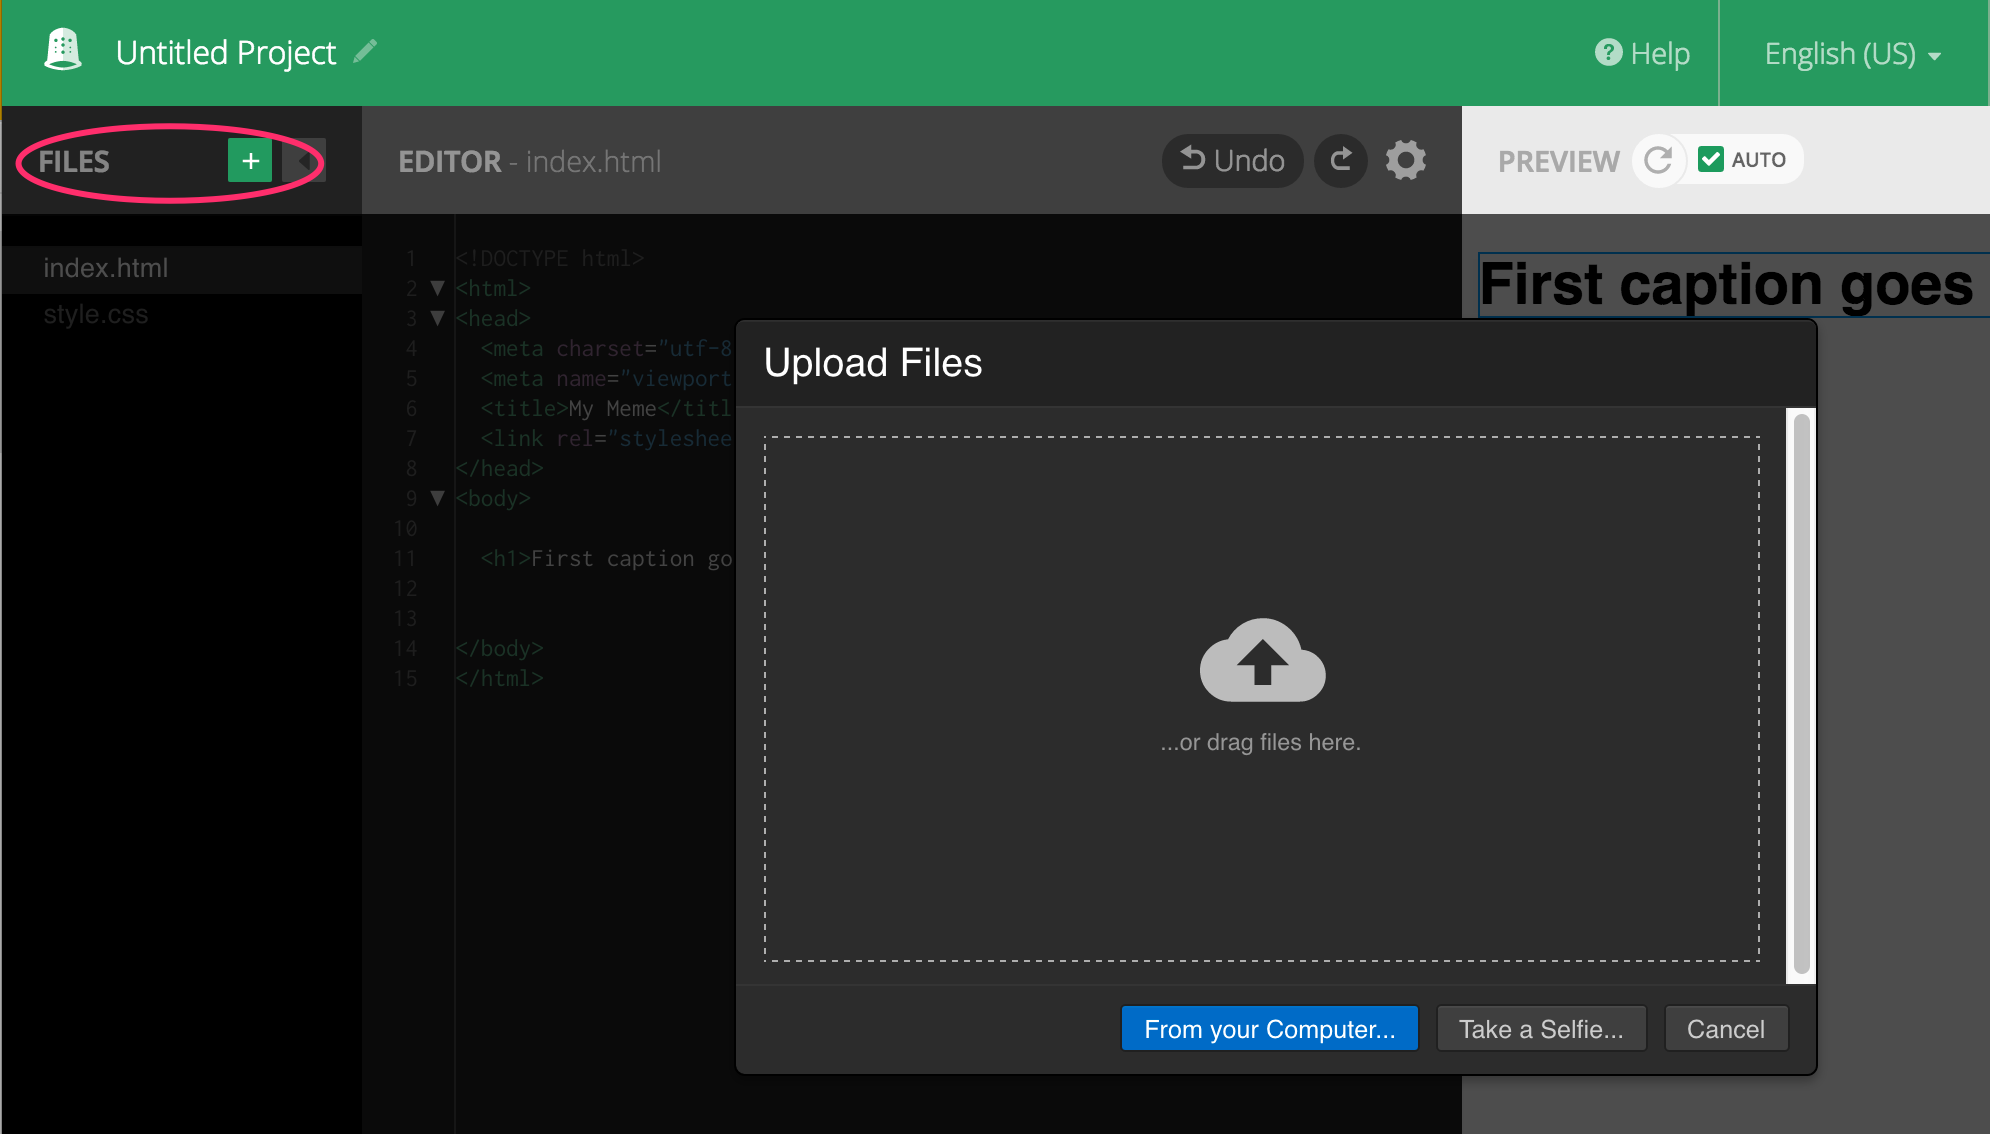
Your uploaded image should now appear in the file list (alongside the CSS and index.html file)
Under the <h1> tags, add an image tag that includes your image file name, like this:
<img src="cat-image.jpeg" />
Images are a bit different to other tags in that they don’t have open and closing tags, but have a self-closed /> at the end.
You can also set a width attribute for the image
<img src="cat-image.jpeg” width=700 />
You can now also add a second heading underneath the image. this time we will make it a second-level heading, using the h2 tag.
<h2> My second heading</h2>
The html page should now look like this:
<!DOCTYPE html>
<html>
<head>
  <meta charset="utf-8">
  <meta name="viewport" content="width=device-width, initial-scale=1">
  <title>My Meme</title>
  <link rel="stylesheet" href="style.css">
</head>
<body>

  <h1>First caption goes here</h1>

  <img src="cat-image.jpeg" />

  <h2> My second heading</h2>

</body>
</html>
But it doesn’t yet look quite right. To change how the page looks, we need to edit the CSS file. Cascading Style Sheets (CSS) allow you to change the appearance of your HTML elements. Click on style.css from the file menu to edit the stylesheet.
Here, you can see the style attributes for the body of the page. We can also add styles to different elements like the headings and images.
It’s quite common for the text on meme images to be all in capitals, so we can set our headings to be in uppercase and also change the colours of the page.
If you use a particular style more than once, you can use it as a class. for example if we give both the headings a class of ‘capitalise’ in the html file:
e.g. <h1 class="capitalise">Heading 1 goes here</h1>
We can then reference that in the stylesheet using a dot followed by the class name.
Update your stylesheet to look like this:
body {
  font-family: "Open Sans", sans-serif;
  background: #111111;
  color: #ffffff;
  }

.capitalise {
 text-transform: uppercase;
  }

h1 {
  text-align: center;
  }

h2 {
   margin-top: -2em;
   text-align: center;
  }

img {
   width: 750px;
   height: auto;
   }
Now, you can edit the text for your meme and make any additional changes to the styles that you want.
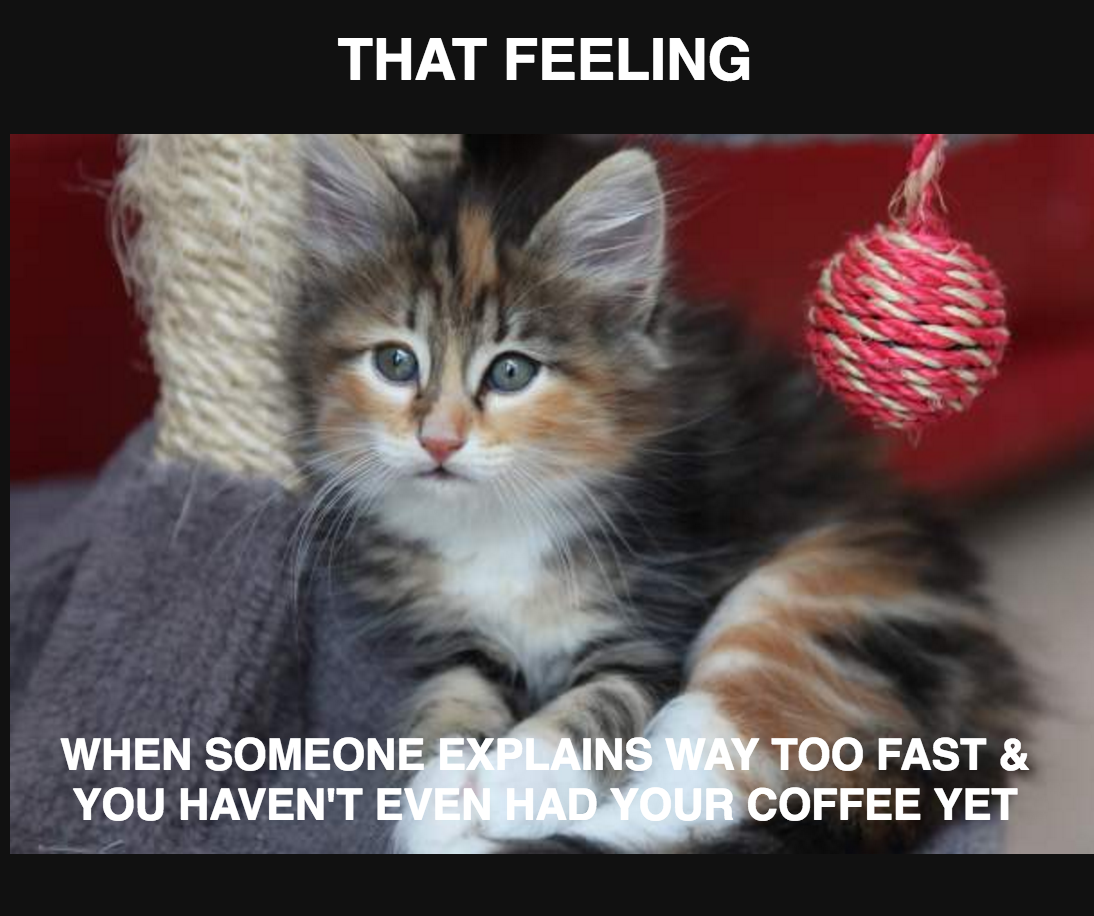
(something like this except funnier)
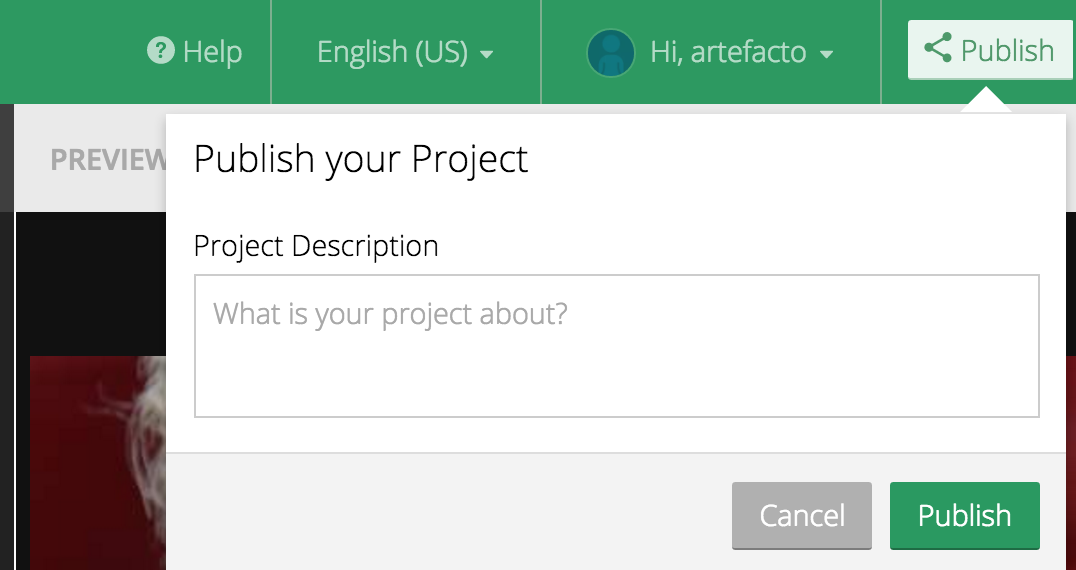
Once your meme is ready, click publish to share it with the world.
Credits
Partly inspired by the original Webmaker project by Laura Fleming (now archived)
Subscribe
Subscribe to this blog via RSS.
Categories
Question 1
Ingredients 21
Recipes 26
Recent Posts
-
 Posted on 24 Jul 2017
-
 Posted on 20 Jun 2017
-
 Posted on 15 Jun 2017
-
Getting started with JavaScript Blocks Editor (PXT) on Micro:Bit
Posted on 10 May 2017
Popular Tags
Arduino (2) Microcontrollers (2) Makeymakey (6) Scratch (8) Coding (6) Software (3) Sketches (1) Ide (1) Raspberrypi (11) Linux (2) 3dprinting (1) Manufacturing (1) Vr (1) Virtual_reality (1) Google (1) Circuits (3) Littlebits (4) Kits (2) Keyboard (2) Inputs (1) Cli (1) Command-line (1) Magazine (1) Make (2) Events (4) Makerfaire (1) Wires (2) Equipment (2) Breadboard (1) Electronics (3) Audio (1) Soundplant (2) Planning (2) Funding (1) Ozobot (1) Creative-computing (1) Music (3) Sonicpi (3) Cloudbit (2) Thimble (1) Images (1) Html (2) Webmakers (2) Internet (1) Ifttt (1) Sensors (2) Css (1) Learntocode (4) Paint (1) Conductivity (2) Picoboard (2) Activities (1) Workshops (3) Families (1) Microbit (4) Javascript (2) Paper (1) Electricity (1) Display (1) Browser (1) Remote (1) Headless (1) Signage (2) Digital signage (2) Privacy (1) Security (1) Configuration (1) Tools (1) Troubleshooting (1) Bugs (1) Problem-based learning (1) Hex (1) Programs (1) Onboarding (1)