Getting started with Sonic Pi
Installing SonicPi
SonicPi comes installed on the latest versions of Raspbian (the Debian flavour created for the Raspberry Pi) but you can also install it directly on earlier versions by typing the following command at the command line.
$ sudo apt-get install sonic-pi
Once installed you can access Sonic Pi via the desktop:
$ type startx
There are also versions available for Windows, Mac and Linux that you can download from http://sonic-pi.net/
The official tutorial
The first thing you’ll notice when you first launch Sonic Pi is that it directs you to a tutorial. You can access the different parts of the tutorial from the bottom pane, underneath the main code editor panel.
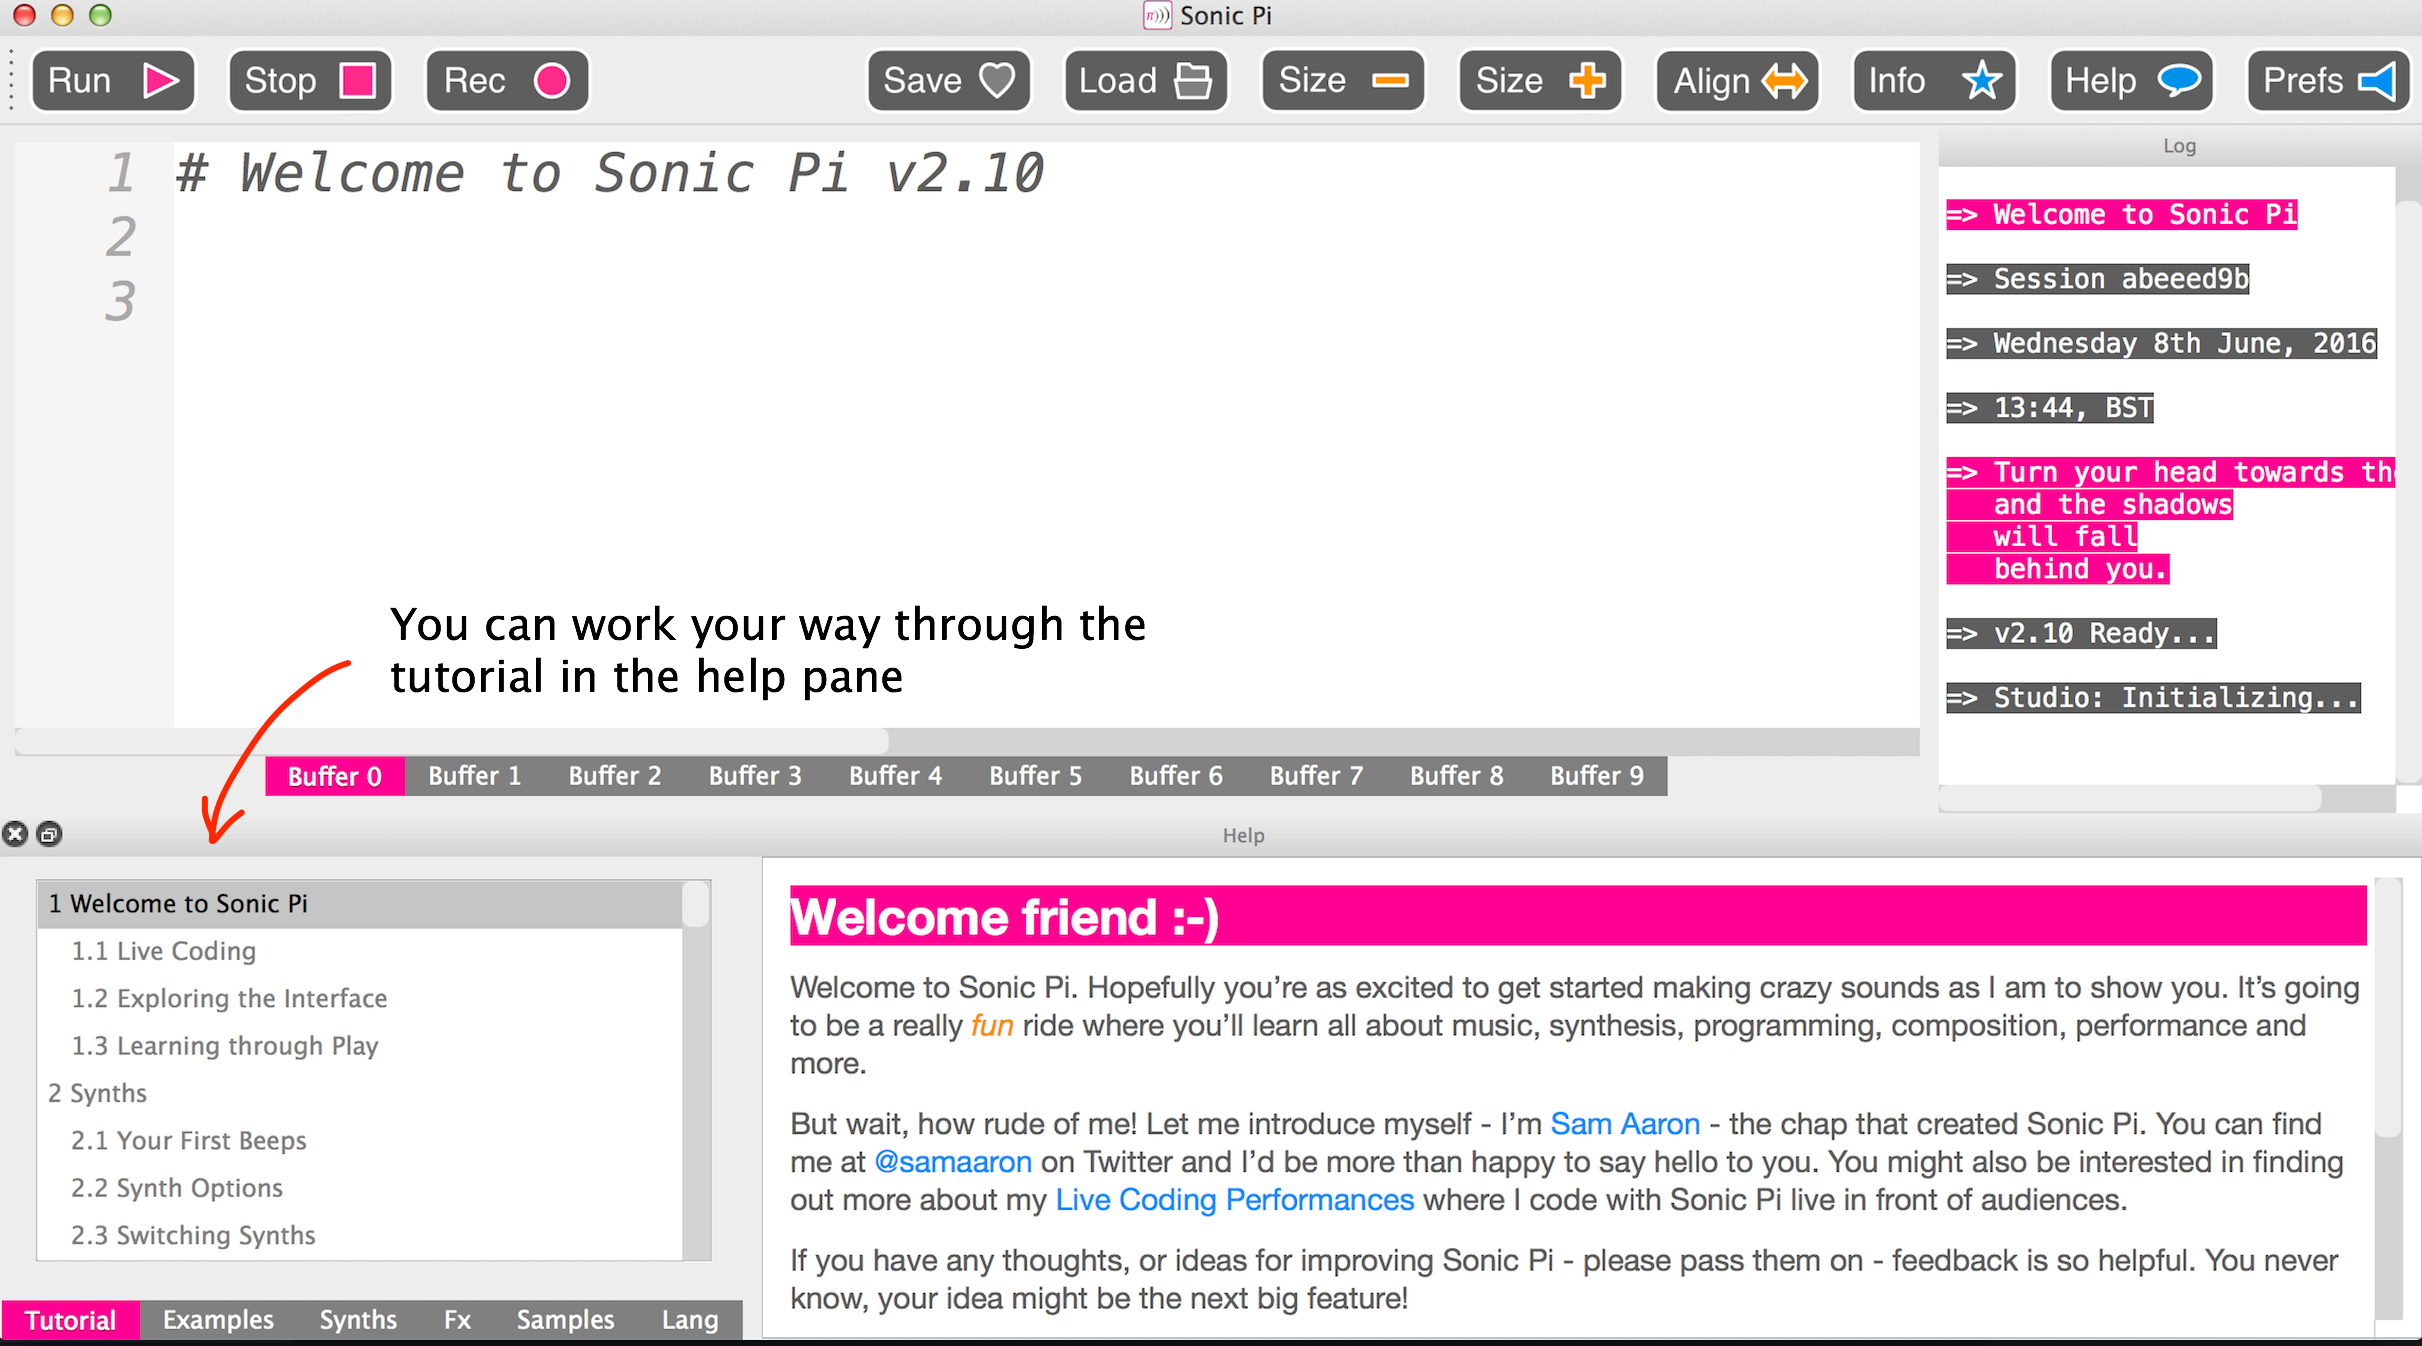
This tutorial will introduce you to the Sonic Pi and the different parts of the Sonic Pi interface. It will also walk you through your first program and help you learn a bit about coding in Sonic Pi.
The interface
The main parts of the Sonic Pi interface are the Code Editor, the main menu, the Help panel and the Log Viewer.
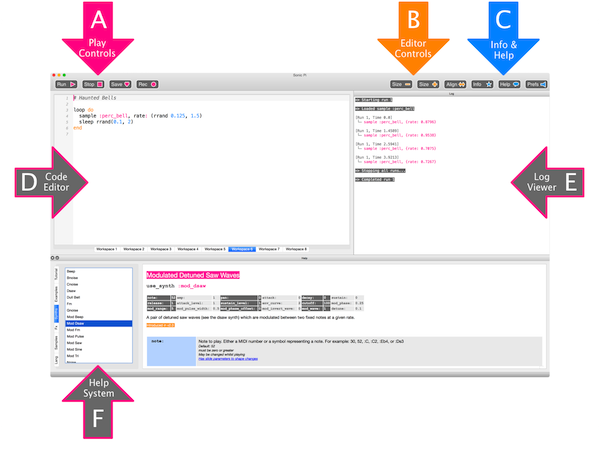
The Run and Stop buttons in the main menu are how you start and stop your script. In the main menu, you can also save and open files, open and close the help panel and change your preferences configuration.

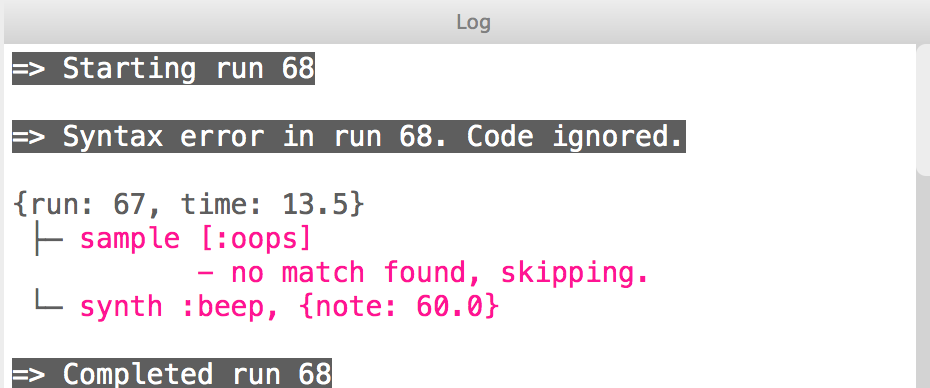
You can see the output of your running program in the Log Viewer.
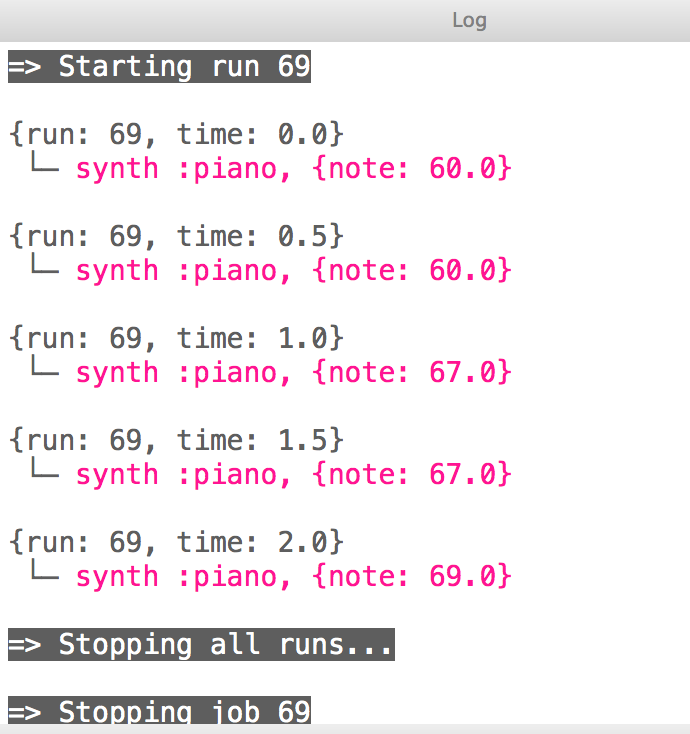
As well as showing you what the code is running, the log window will also tell you if there are any errors.
Subscribe
Subscribe to this blog via RSS.
Categories
Question 1
Ingredients 21
Recipes 26
Recent Posts
-
 Posted on 24 Jul 2017
-
 Posted on 20 Jun 2017
-
 Posted on 15 Jun 2017
-
Getting started with JavaScript Blocks Editor (PXT) on Micro:Bit
Posted on 10 May 2017
Popular Tags
Arduino (2) Microcontrollers (2) Makeymakey (6) Scratch (8) Coding (6) Software (3) Sketches (1) Ide (1) Raspberrypi (11) Linux (2) 3dprinting (1) Manufacturing (1) Vr (1) Virtual_reality (1) Google (1) Circuits (3) Littlebits (4) Kits (2) Keyboard (2) Inputs (1) Cli (1) Command-line (1) Magazine (1) Make (2) Events (4) Makerfaire (1) Wires (2) Equipment (2) Breadboard (1) Electronics (3) Audio (1) Soundplant (2) Planning (2) Funding (1) Ozobot (1) Creative-computing (1) Music (3) Sonicpi (3) Cloudbit (2) Thimble (1) Images (1) Html (2) Webmakers (2) Internet (1) Ifttt (1) Sensors (2) Css (1) Learntocode (4) Paint (1) Conductivity (2) Picoboard (2) Activities (1) Workshops (3) Families (1) Microbit (4) Javascript (2) Paper (1) Electricity (1) Display (1) Browser (1) Remote (1) Headless (1) Signage (2) Digital signage (2) Privacy (1) Security (1) Configuration (1) Tools (1) Troubleshooting (1) Bugs (1) Problem-based learning (1) Hex (1) Programs (1) Onboarding (1)