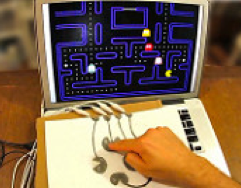
Create Interactive Drawings With MaKey MaKey and Scratch
Info
Do you love drawing? We do. But wouldn’t it be cool to use your pencil drawing as a remote control?
Here we’re going to show you how to move a Scratch sprite with a drawing you’ve made.
You may ask how it’s even possible.
The magic lies in the fact that pencil lead is graphite, a form of carbon, which due to the vast electron delocalisation within the carbon layers can conduct electricity.
Not familiar with Scratch? No worries, this step-by-step recipe will help you get started.
What you need
- MaKey MaKey (including Mini-B USB cable)
- Paper
- Graphite pencil (a school pencil will do, but a graphite pencil is more reliable)
- Alligator clips
- Scratch software
- Computer
- Sound files
How
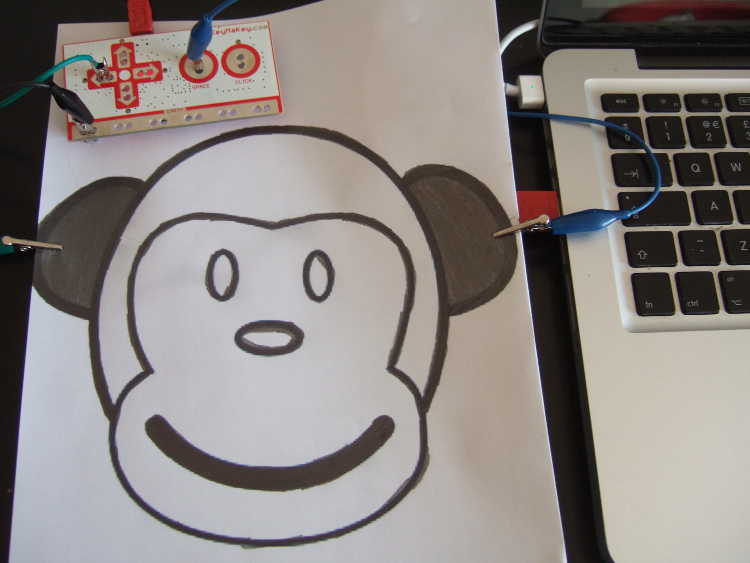
- Draw a picture on a piece of paper with a graphite pencil. Make sure the lines are thick and unbroken. In our case we drew a monkey head with big ears that we coloured in.
- Open this link on your browser https://scratch.mit.edu/ to access the Scratch software.
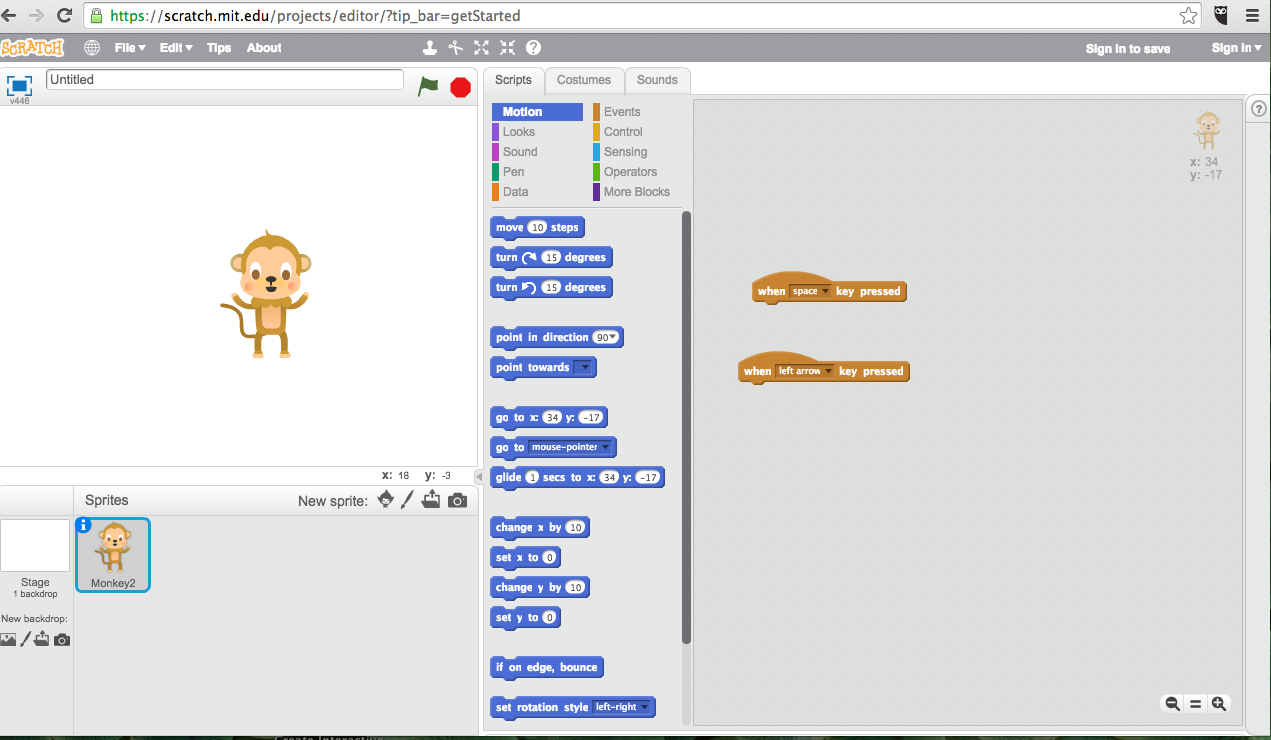
- At the Scratch site, click on ‘try it out’ and start to explore it. In this case we want to substitute a cat sprite for a monkey. To do so we choose a monkey sprite from an existing Scratch library. Once we have a new sprite on the stage, we right click the original cat sprite and delete it.
- Now we want to control our monkey’s movement. We want to be able to control it with “space” and “left arrow” keys. To do so we choose “event” and drag ‘when space key pressed’ block to the right area. Then we make a duplicate and change ‘space’ for ‘left arrow’.
-
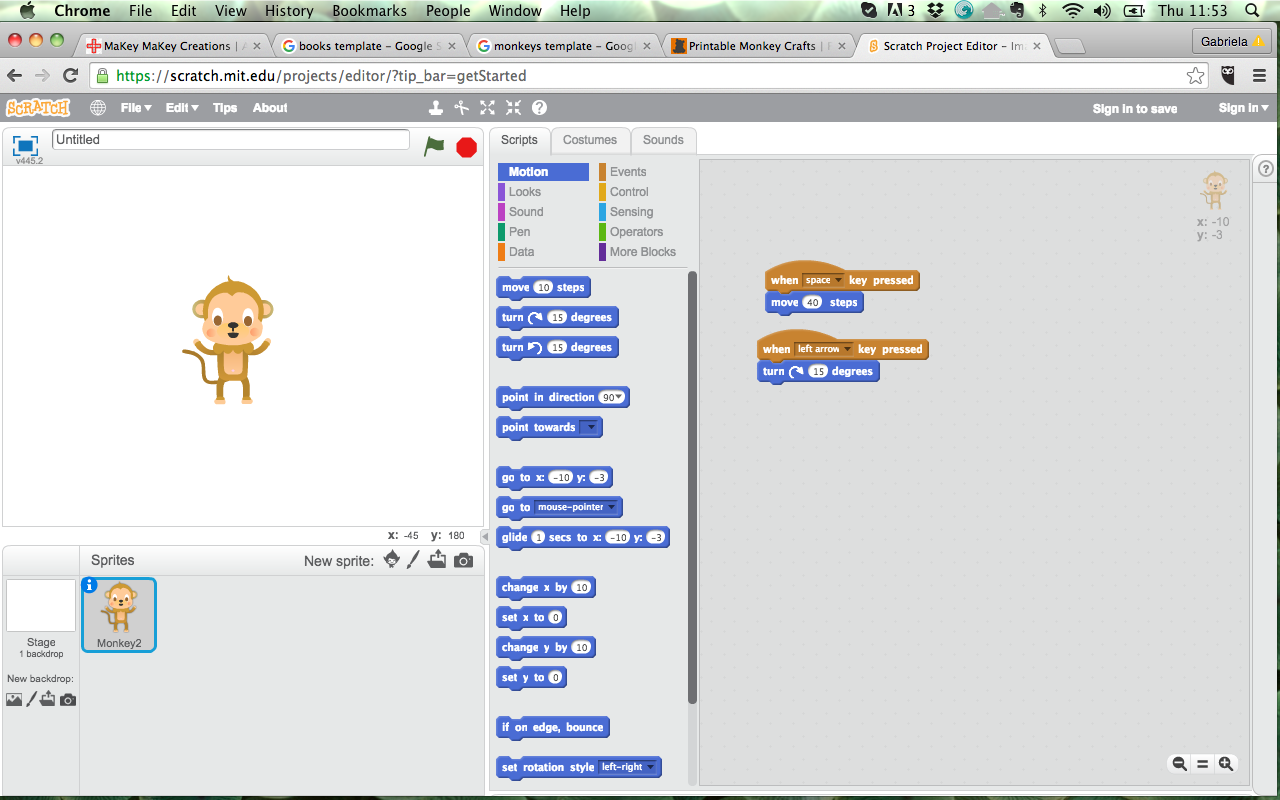
We want the sprite move 40 steps when space key is pressed and turn clockwise 15 degrees when left arrow is pressed. We choose “movement” and drag ‘move 40 steps’ and ‘turn 15 degrees’ to the right area.
- Now it’s time to connect MaKey MaKey into your computer using USB cable. Plug the small side of USB cable into MaKey MaKey and the big side into your computer. (If your computer asks you to install the drivers, simply click cancel or close the window.)
- Connect to Earth - Now you can connect one end of an alligator clip to the bottom of MaKey MaKey which is marked as “Earth”.
- Connect to Yourself - Then you hold the other end of the alligator clip (the metal part) between your fingers, and now you become “grounded”.
- Connect MaKey MaKey to your drawing - If you want your drawings to become your keyboard keys, you connect them to your MaKey MaKey with the help of alligator clips. On the front side of MaKey MaKey you find “space” and “left arrow”. Connect them with two alligator clips to two parts of your graphite drawing. In our case, we connected MaKey MaKey “space” and “left arrow” to the monkey’s ears.
- Touch the monkey’s ears on your drawing and control movements of the sprite! (Don’t forget the step 7)
Subscribe
Subscribe to this blog via RSS.
Categories
Question 1
Ingredients 21
Recipes 26
Recent Posts
-
 Posted on 24 Jul 2017
-
 Posted on 20 Jun 2017
-
 Posted on 15 Jun 2017
-
Getting started with JavaScript Blocks Editor (PXT) on Micro:Bit
Posted on 10 May 2017
Popular Tags
Arduino (2) Microcontrollers (2) Makeymakey (6) Scratch (8) Coding (6) Software (3) Sketches (1) Ide (1) Raspberrypi (11) Linux (2) 3dprinting (1) Manufacturing (1) Vr (1) Virtual_reality (1) Google (1) Circuits (3) Littlebits (4) Kits (2) Keyboard (2) Inputs (1) Cli (1) Command-line (1) Magazine (1) Make (2) Events (4) Makerfaire (1) Wires (2) Equipment (2) Breadboard (1) Electronics (3) Audio (1) Soundplant (2) Planning (2) Funding (1) Ozobot (1) Creative-computing (1) Music (3) Sonicpi (3) Cloudbit (2) Thimble (1) Images (1) Html (2) Webmakers (2) Internet (1) Ifttt (1) Sensors (2) Css (1) Learntocode (4) Paint (1) Conductivity (2) Picoboard (2) Activities (1) Workshops (3) Families (1) Microbit (4) Javascript (2) Paper (1) Electricity (1) Display (1) Browser (1) Remote (1) Headless (1) Signage (2) Digital signage (2) Privacy (1) Security (1) Configuration (1) Tools (1) Troubleshooting (1) Bugs (1) Problem-based learning (1) Hex (1) Programs (1) Onboarding (1)