Making a paper circuit
Intro
Paper circuits are a cheap, creative and accessible way to learn the basics of electronics and circuits.
Using a conductive material like copper tape (or conductive ink), you can create simple circuits on paper that are powered by a coin cell battery.
What you need
- Paper
- Copper tape (also sometimes called Slug tape)
- Coin Cell Battery (3V)
- Paper clip
- LED
- Pencil (Optional)
How
To make a circuit, you need to connect a conductive material to a power source and an output. Our output in this case is going to be an Light-emitting diode (LED).
But first, you need to design your circuit. It’s easier to create the conductive path if you first sketch out the design to follow on the paper.
Start with something simple, you can alway add more to it later.
Then add the conductive tape. This will be the conductive pathway for the current to flow through (from high to low).
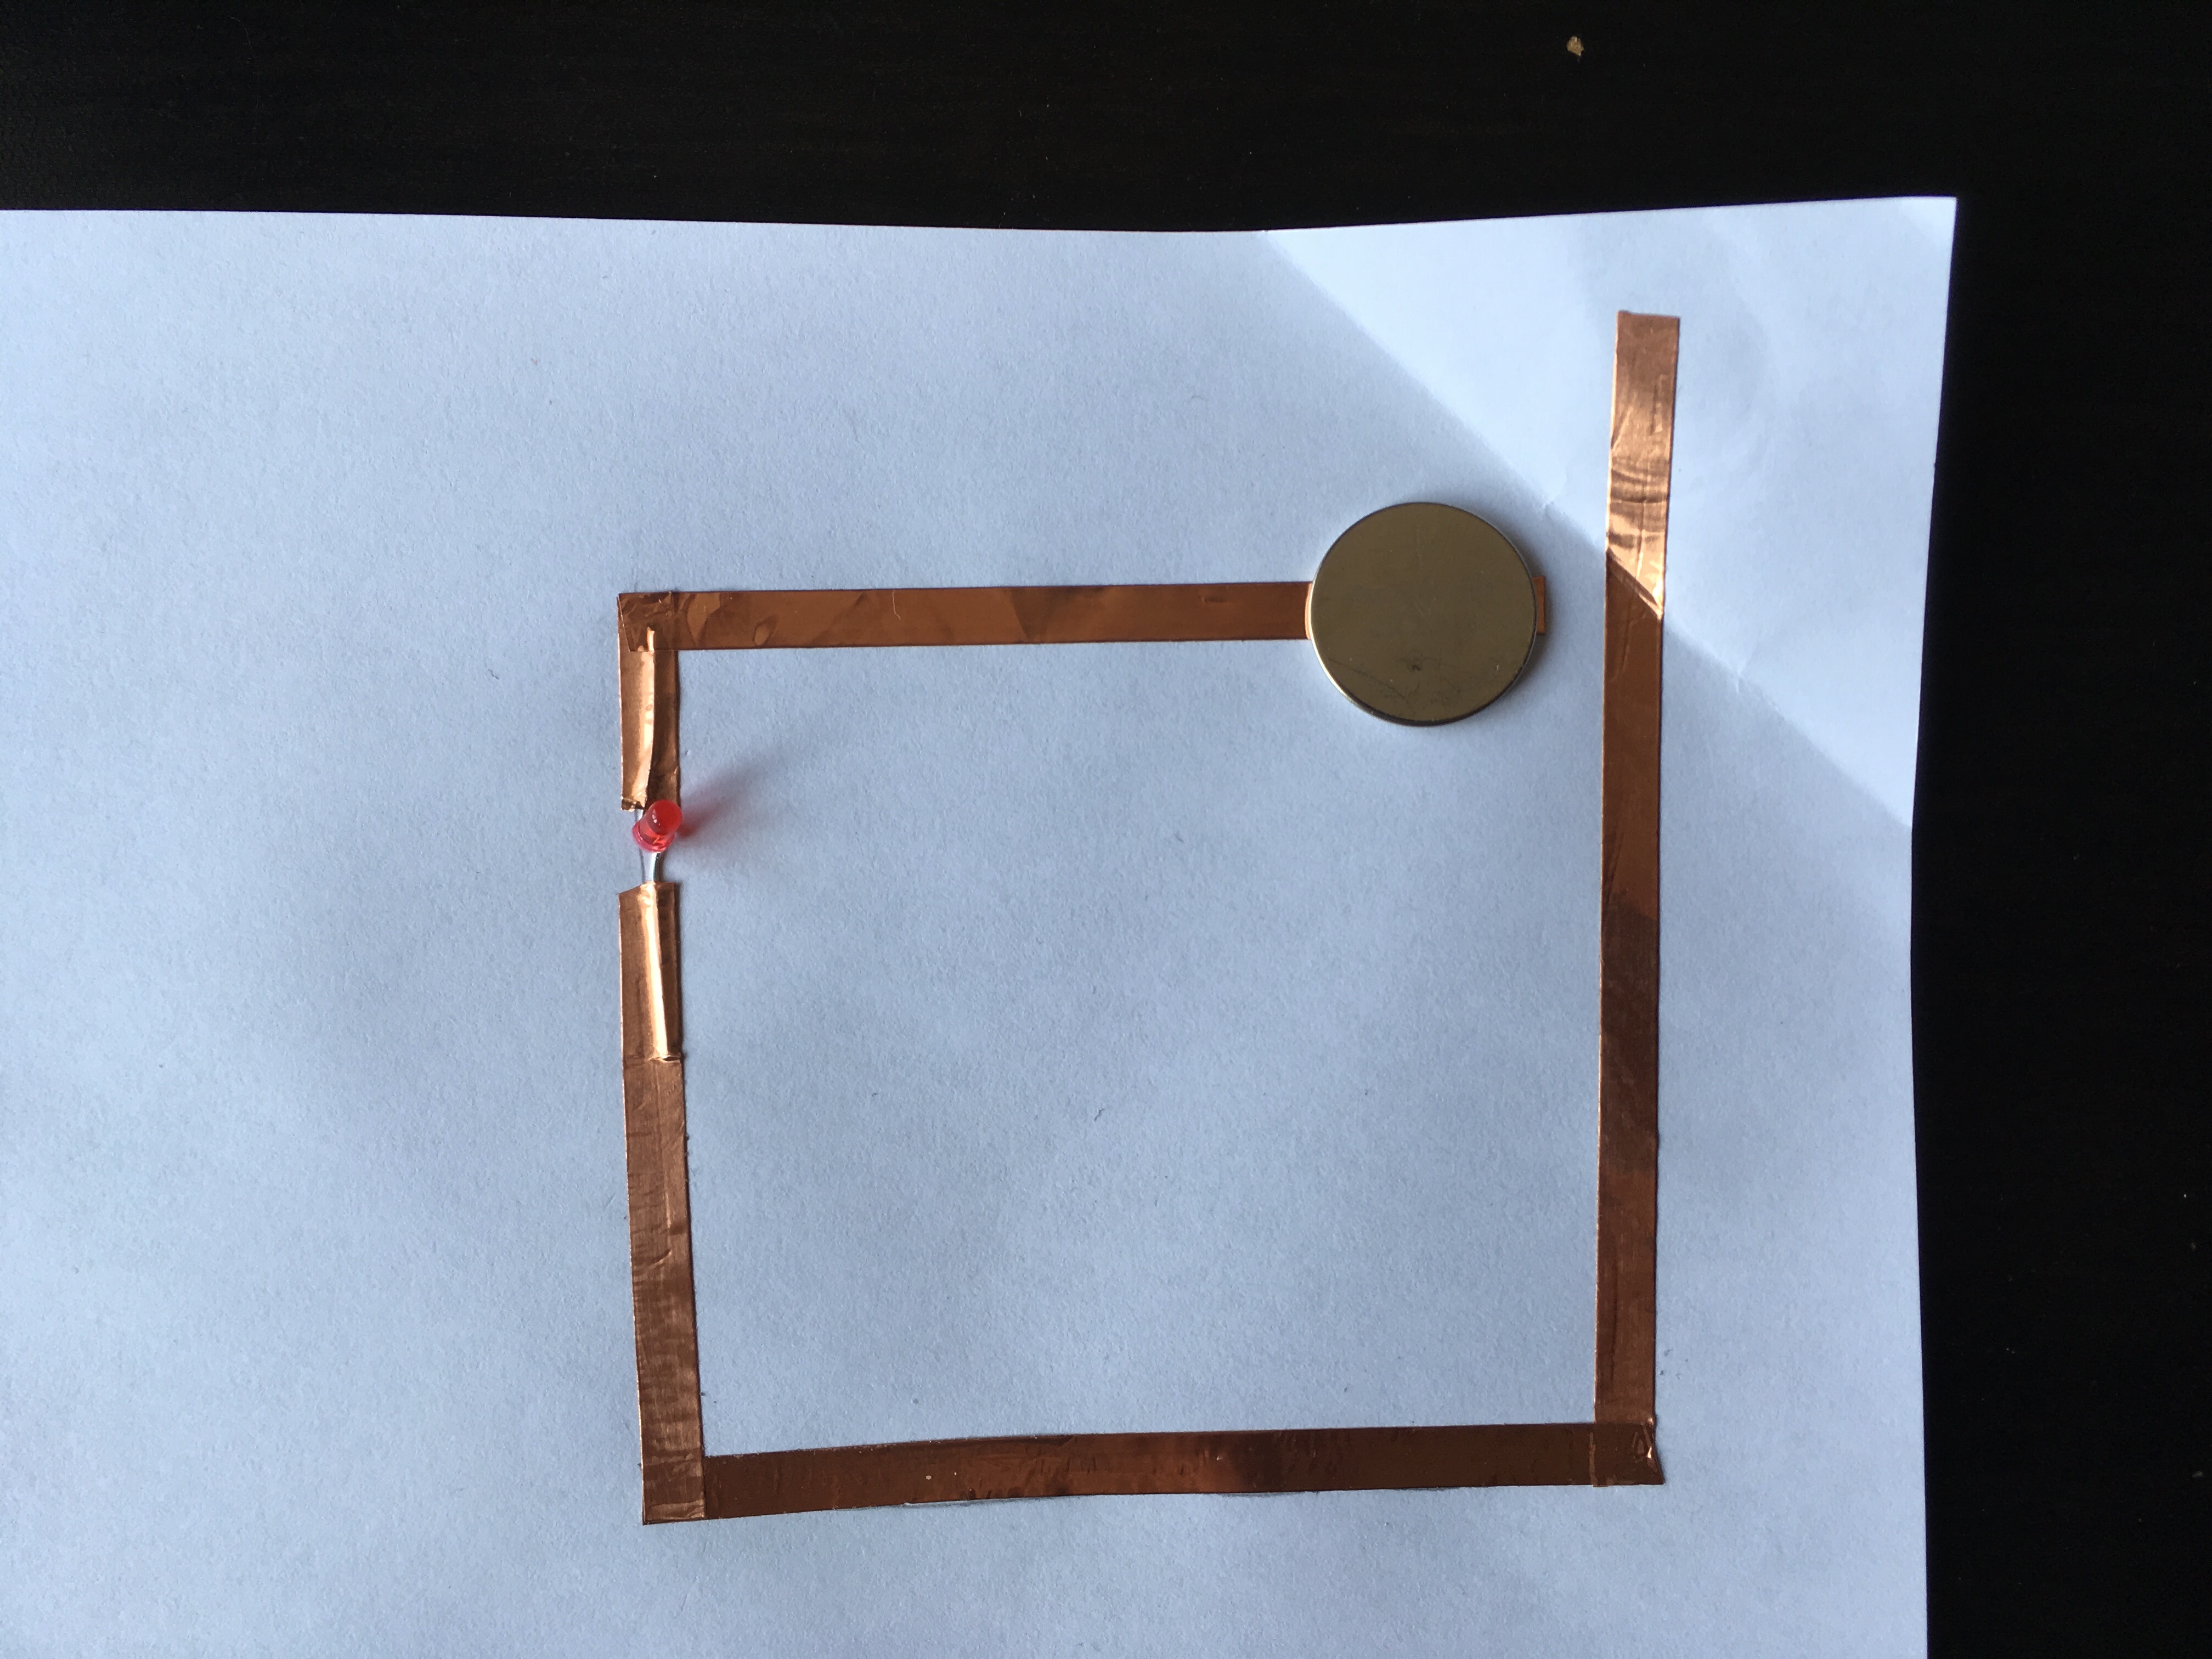
When you add the tape, ensure you are connecting the positive side of the battery (marked with a +) with the positive side of the LED (the longer leg), and the negative side of the battery with the positive side of the LED (the shorter leg).
In our case, we used a paper clip to complete the circuit, and thus created a very simple switch.
Open circuit:
Closed circuit:
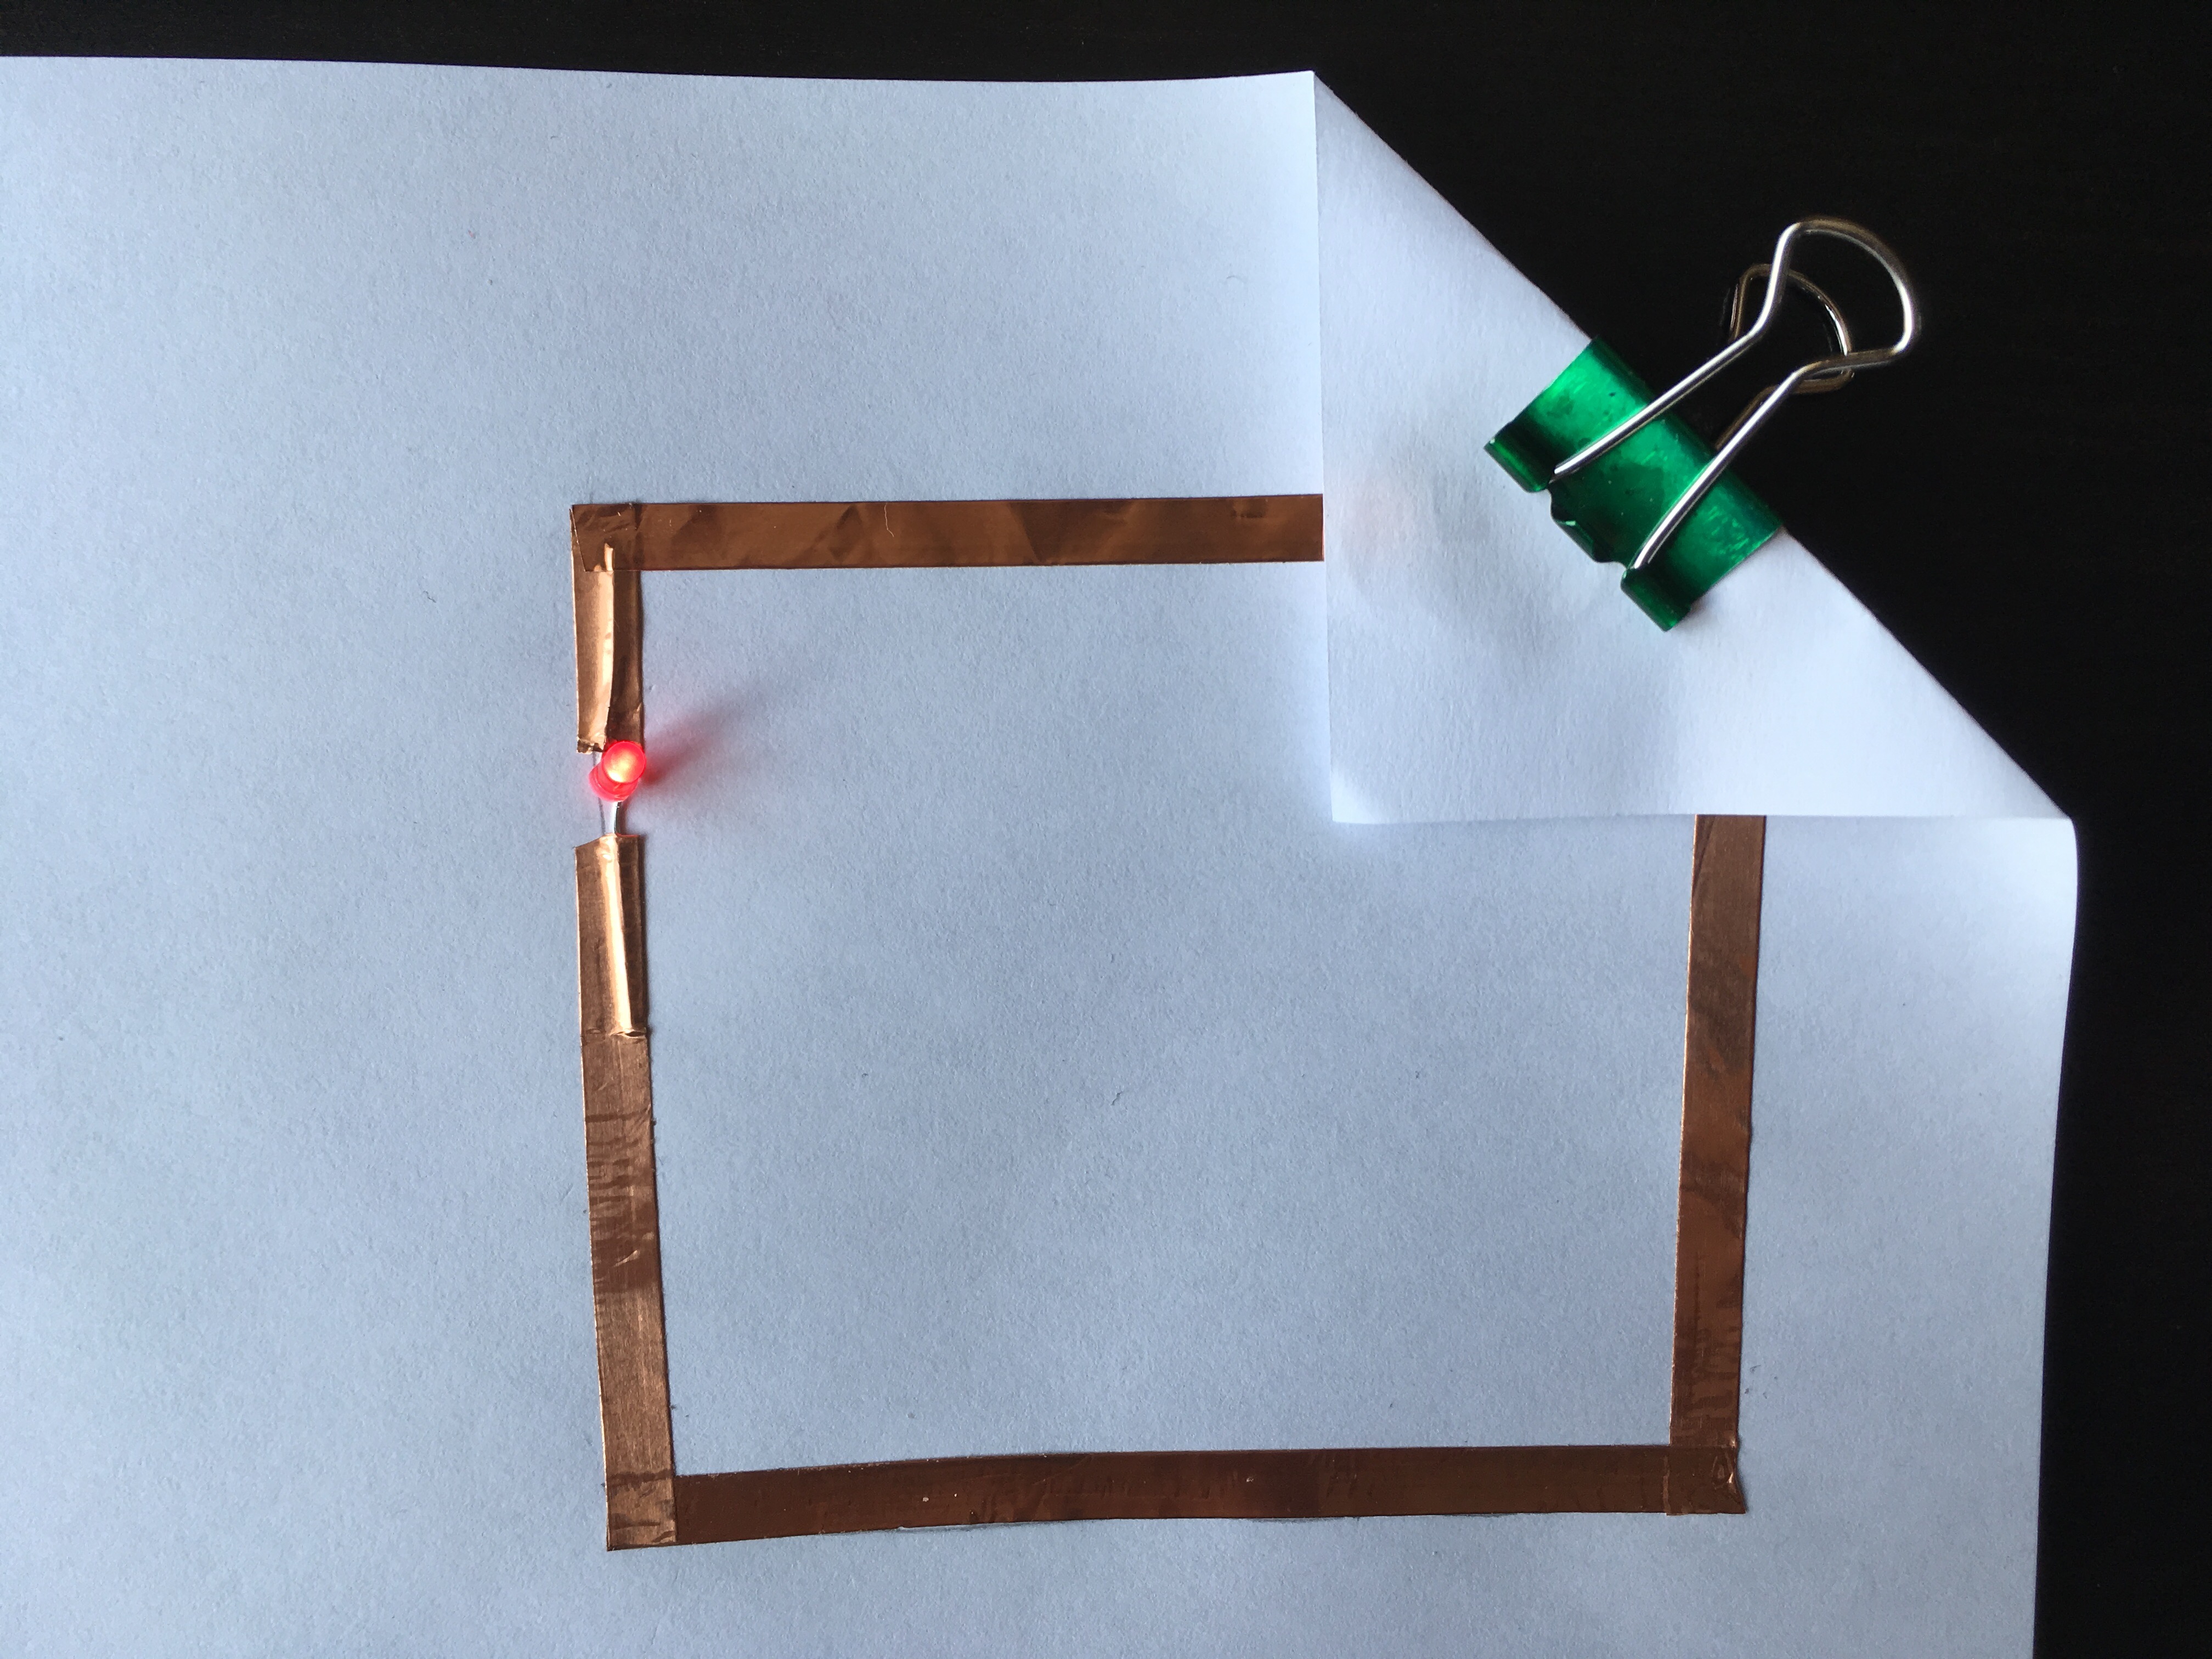
If your LED doesn’t come on, press down on the battery to see if the connection needs more pressure.
You can also try adding another layer of tape or using other conductive materials.
That’s all. Have fun.
Subscribe
Subscribe to this blog via RSS.
Categories
Question 1
Ingredients 21
Recipes 26
Recent Posts
-
 Posted on 24 Jul 2017
-
 Posted on 20 Jun 2017
-
 Posted on 15 Jun 2017
-
Getting started with JavaScript Blocks Editor (PXT) on Micro:Bit
Posted on 10 May 2017
Popular Tags
Arduino (2) Microcontrollers (2) Makeymakey (6) Scratch (8) Coding (6) Software (3) Sketches (1) Ide (1) Raspberrypi (11) Linux (2) 3dprinting (1) Manufacturing (1) Vr (1) Virtual_reality (1) Google (1) Circuits (3) Littlebits (4) Kits (2) Keyboard (2) Inputs (1) Cli (1) Command-line (1) Magazine (1) Make (2) Events (4) Makerfaire (1) Wires (2) Equipment (2) Breadboard (1) Electronics (3) Audio (1) Soundplant (2) Planning (2) Funding (1) Ozobot (1) Creative-computing (1) Music (3) Sonicpi (3) Cloudbit (2) Thimble (1) Images (1) Html (2) Webmakers (2) Internet (1) Ifttt (1) Sensors (2) Css (1) Learntocode (4) Paint (1) Conductivity (2) Picoboard (2) Activities (1) Workshops (3) Families (1) Microbit (4) Javascript (2) Paper (1) Electricity (1) Display (1) Browser (1) Remote (1) Headless (1) Signage (2) Digital signage (2) Privacy (1) Security (1) Configuration (1) Tools (1) Troubleshooting (1) Bugs (1) Problem-based learning (1) Hex (1) Programs (1) Onboarding (1)