Raspberry Pi Digital Signage with Screenly
Intro
You can use a Raspberry Pi attached to a monitor or TV as a affordable digital signage solution to display websites, images or videos. In this example, we use Screenly OS to create a simple digital signage solution.
What you need
- Raspberry Pi with internet connection
- SD card (at least 8gb)
- HDMI cable
- Monitor with HDMI input
How
Download the Screenly image from :
https://github.com/wireload/screenly-ose/releases
To copy this on to your SD card, you can follow the instructions here.
https://www.raspberrypi.org/documentation/installation/installing-images/
When you boot up the Raspberry Pi with your Screenly SD card, you should see a welcome screen that displays the local IP address that you can access the Screenly configuration interface. This is general something like
192.168.0.x:8080
You can then navigate to this address from any computer on the local network to start configuring your digital display.
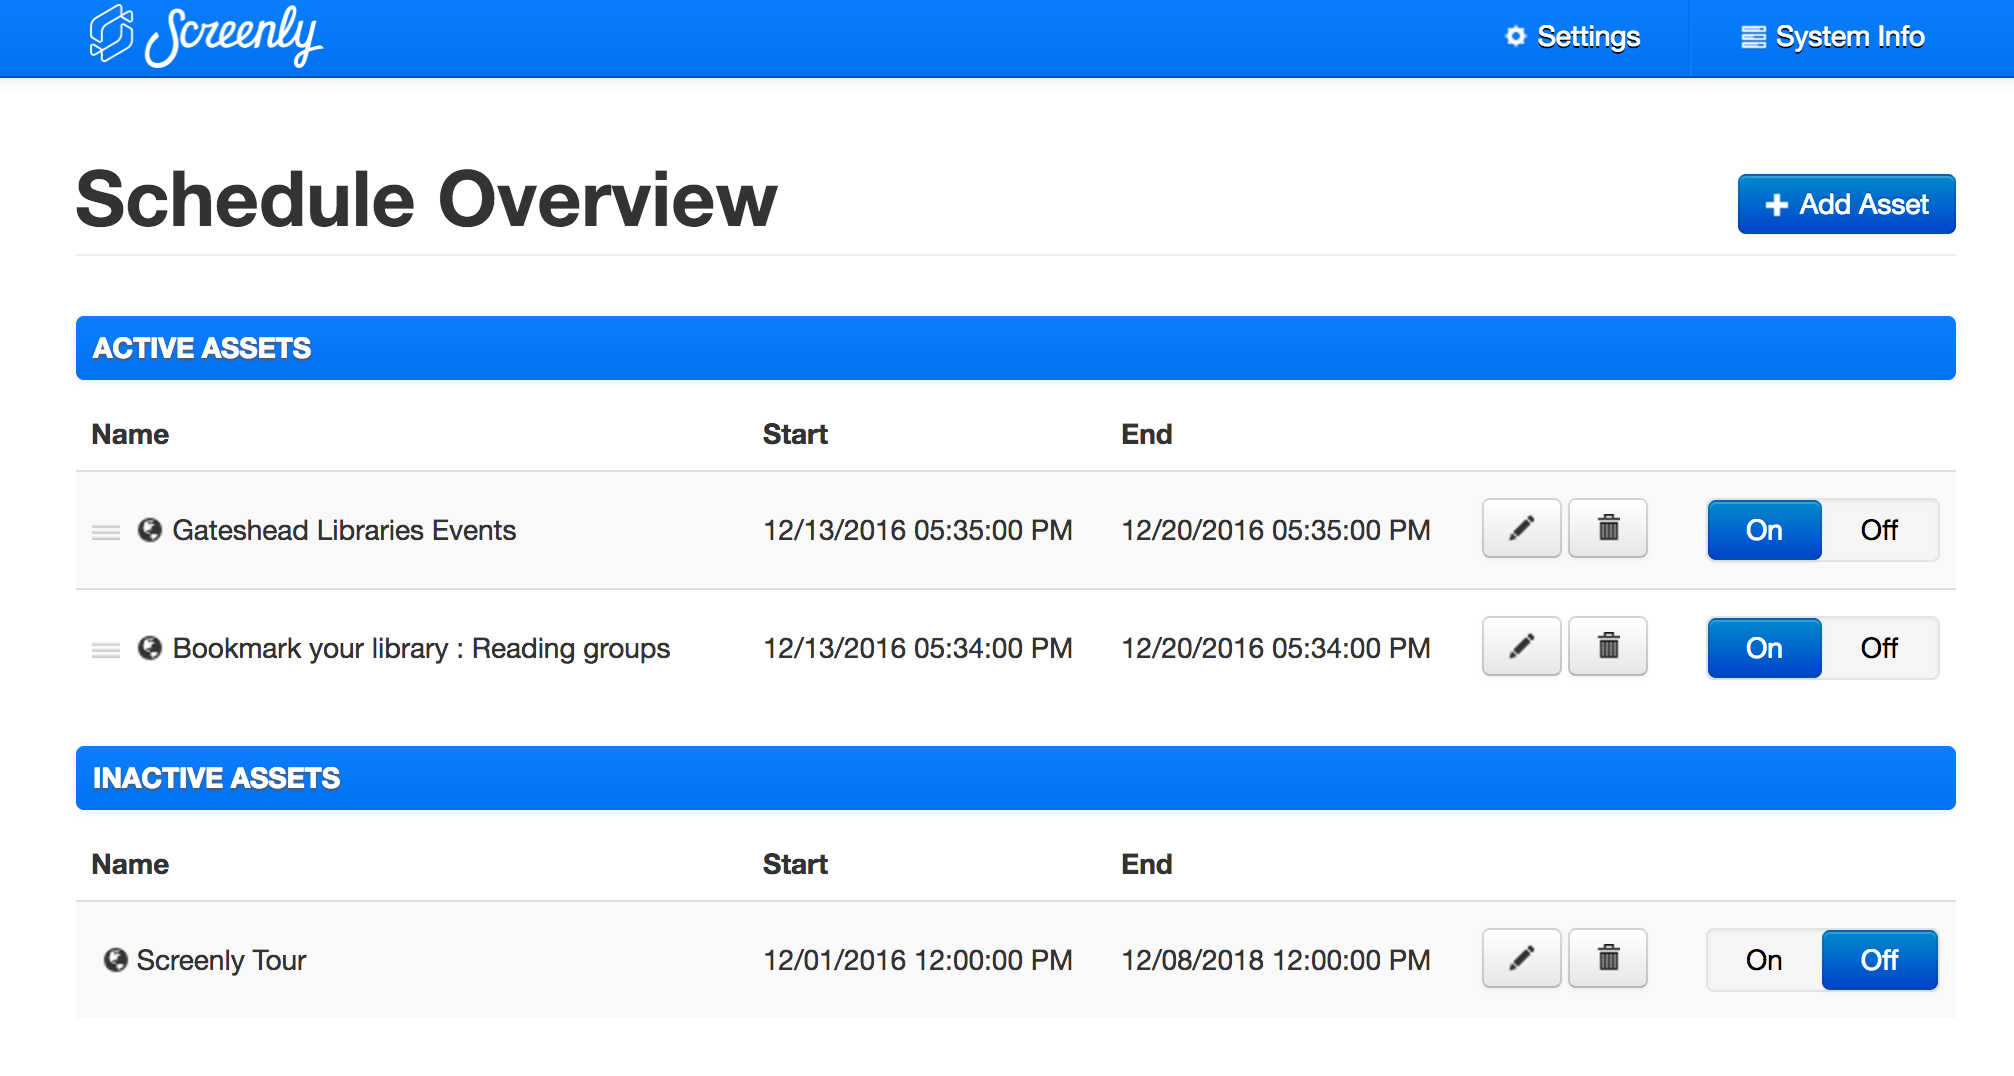
When you open the Screenly manager, you will be able to add and remove ‘assets’ to display on your digital display. These can be either images, videos or webpages and will work best if sized for a 1920x1080 display.
They can be uploaded from your computer or added by URL.
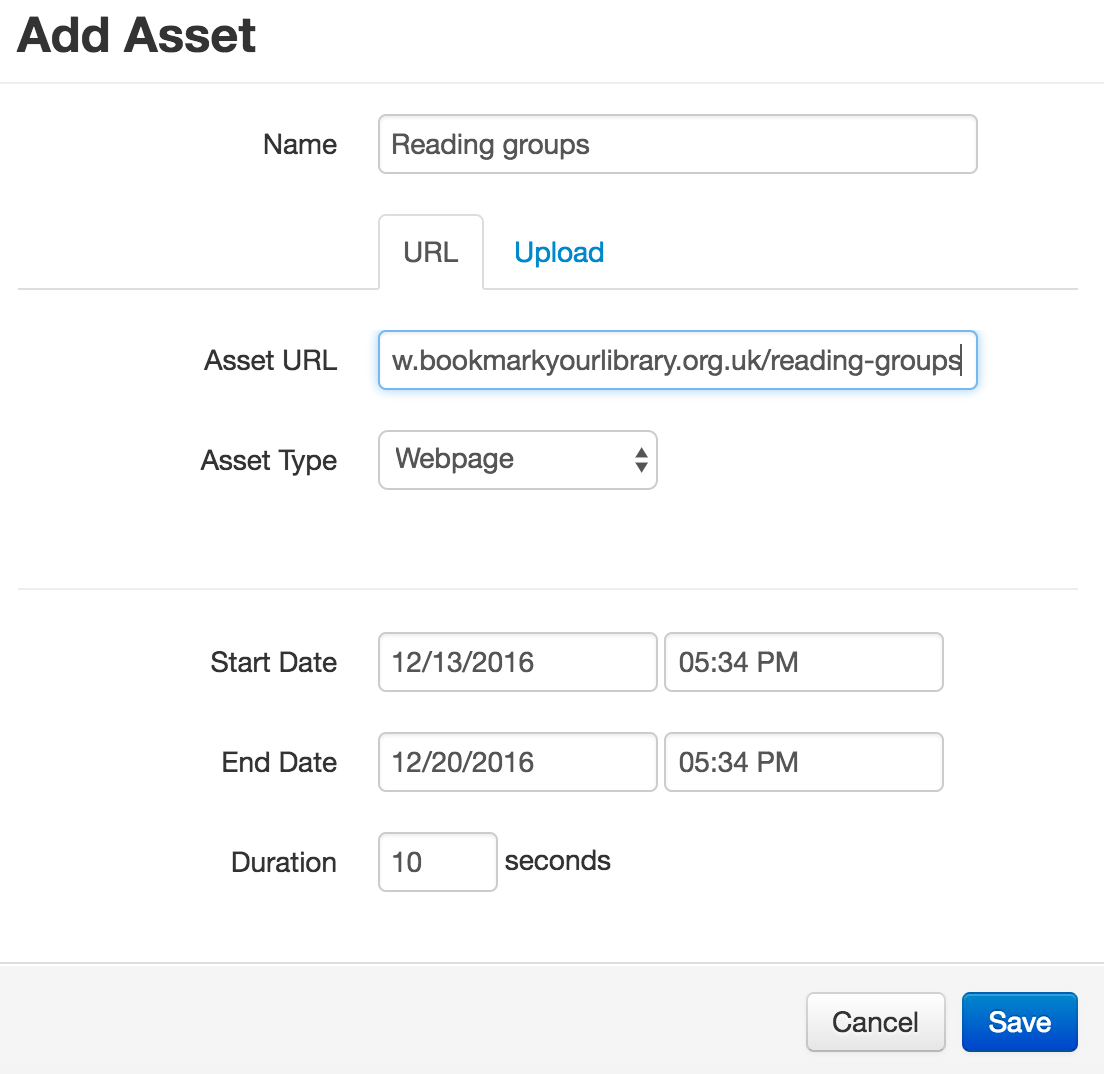
You can also edit the assets to change how long they display for and set an expiry date for a particular display.
More info
Where to next
- https://www.raspberrypi.org/forums/viewtopic.php?f=41&t=12396 - Screenly OSE thread on the Raspberry Pi forum.
Subscribe
Subscribe to this blog via RSS.
Categories
Question 1
Ingredients 21
Recipes 26
Recent Posts
-
 Posted on 24 Jul 2017
-
 Posted on 20 Jun 2017
-
 Posted on 15 Jun 2017
-
Getting started with JavaScript Blocks Editor (PXT) on Micro:Bit
Posted on 10 May 2017
Popular Tags
Arduino (2) Microcontrollers (2) Makeymakey (6) Scratch (8) Coding (6) Software (3) Sketches (1) Ide (1) Raspberrypi (11) Linux (2) 3dprinting (1) Manufacturing (1) Vr (1) Virtual_reality (1) Google (1) Circuits (3) Littlebits (4) Kits (2) Keyboard (2) Inputs (1) Cli (1) Command-line (1) Magazine (1) Make (2) Events (4) Makerfaire (1) Wires (2) Equipment (2) Breadboard (1) Electronics (3) Audio (1) Soundplant (2) Planning (2) Funding (1) Ozobot (1) Creative-computing (1) Music (3) Sonicpi (3) Cloudbit (2) Thimble (1) Images (1) Html (2) Webmakers (2) Internet (1) Ifttt (1) Sensors (2) Css (1) Learntocode (4) Paint (1) Conductivity (2) Picoboard (2) Activities (1) Workshops (3) Families (1) Microbit (4) Javascript (2) Paper (1) Electricity (1) Display (1) Browser (1) Remote (1) Headless (1) Signage (2) Digital signage (2) Privacy (1) Security (1) Configuration (1) Tools (1) Troubleshooting (1) Bugs (1) Problem-based learning (1) Hex (1) Programs (1) Onboarding (1)